In a few seconds, you’re going to see a popup appear on the bottom right of your screen.
“I hate popups” you may be thinking.
The truth is, you probably don’t. Even though many web-visitors would say they prefer never seeing another popup in their life;
The data shows that popups DO work, and people DO engage with them
(Has the popup shown up yet?)
That is my HelloBar popup and today, I want to share with you my HelloBar review to share with you my experiences with it and whether it’s worth its price or not.
In this guide/review, I will be sharing:
- What Hellobar really is,
- How it works (with different popup types),
- How to set it up on your website,
- How much does the HelloBar tool cost,
- How to set up your HelloBar on your website and;
- a whole lot more…
This will be a lengthy review, so get comfortable.
Is The HelloBar Plugin Worth It? $0 to $99 p/month
-
Price
-
Features
-
Setting Up
-
Value For Money
HelloBar Review: TLDR Summary
- Quick and simple set up ✔️
- Very easy to use ✔️
- Works amazingly well ✔️
- Slightly expensive ✖️
- Needs better targeting options ✖️

What Is The HelloBar Tool?
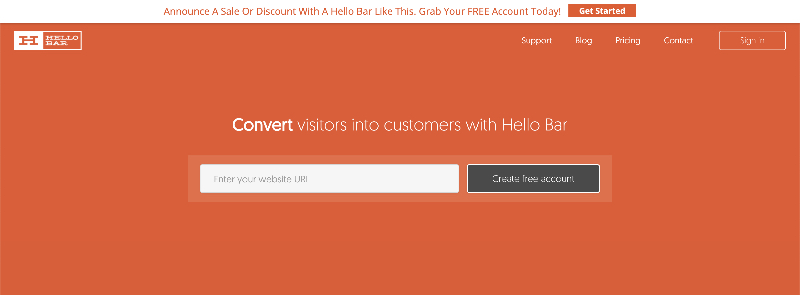
HelloBar is a tool that will help you display various “popup” banners on your website with ease.
Funded and created by IM legend Neil Patel, this tool is – in my humble opinion – one of the best popup management tools you can use on your website (and I’m about to tell you why soon).
I have been using this tool on and off for a few years now but have since shifted all my pop up campaigns over to HelloBar because it’s what I find to work the best for me (and what I’m trying to do).
Before I tell you what I like (and don’t like) about HelloBar;
First, let’s take a closer look at HelloBar from the inside and the different types of popups you can create.
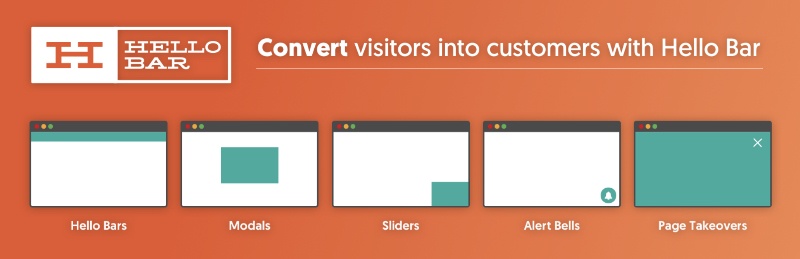
The Types of HelloBar Popups You Can Create
At the time of writing this, there are five main types of popups you can create with HelloBar and I will explain what they do (and how to best use them below).
To find these popup types, you simply have to:
01: Click the ‘Create New PopUp” In The Dashboard:

There will be a “new popup button” on the left-hand side of your screen once you’ve created your (free) HelloBar account.
02: Pick A Goal:
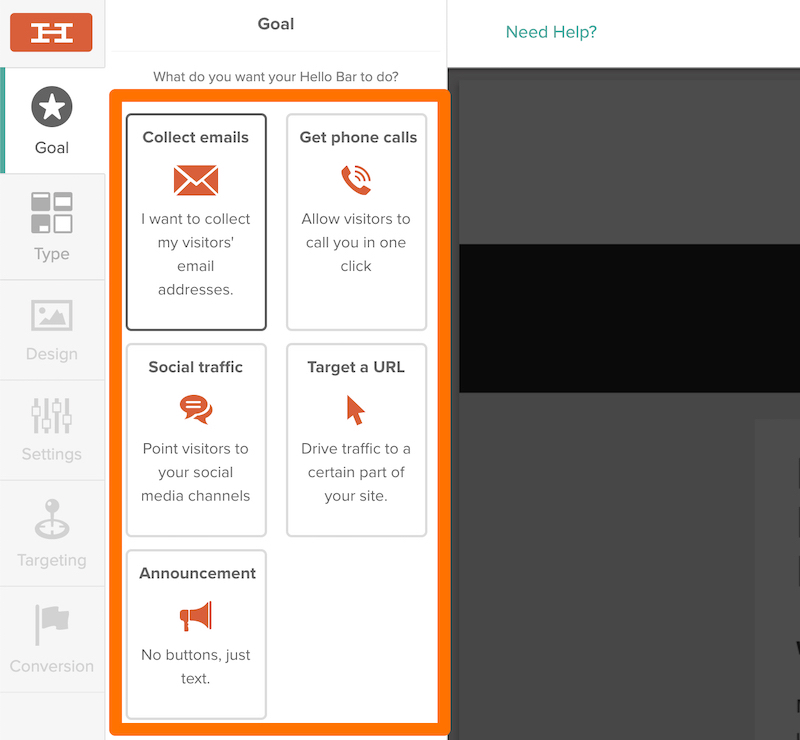
Before you pick the type of popup you like, you must first choose the goal you want to optimize for and track.
The different goal types are:
- Collect emails
- Get phone calls
- Point visitors to your social media
- Divert readers to a specific URL
- Display an Announcement
03: Choose The Type:
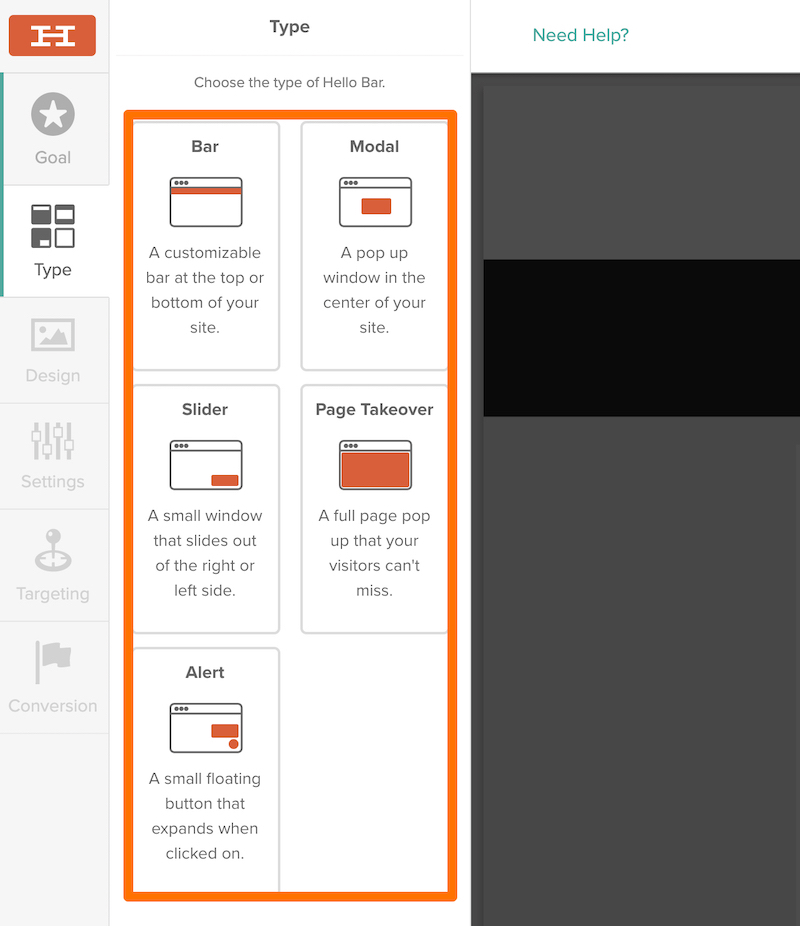
Finally, you get to your “HelloBar type” settings, and I will explain all the different types below.
A HelloBar Bar:
This allows you to display a slim-ish bar either on the top (or bottom) of your page.
I know many bloggers who have had success with this and while I have not yet tried it myself, I am sure it can work incredibly well for whatever you want to use it for.
A Modal Pop Up:
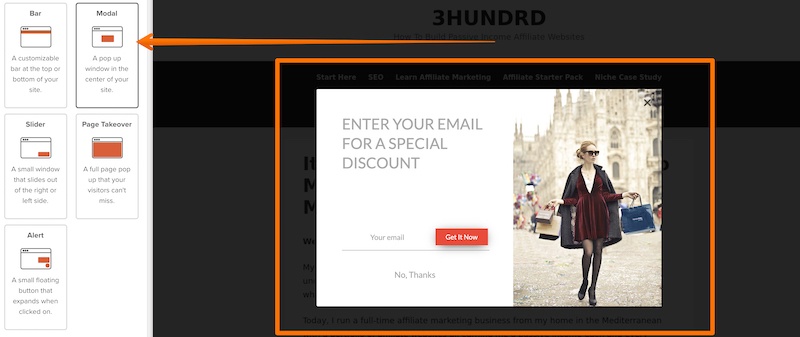
The Modal popup allows you to display a signup form/message smackdown in the middle of your screen.
This is what you usually see all over the internet and they are very popular (and highly effective) at signing up people to your email list.
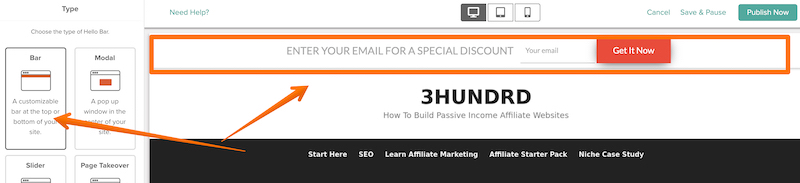
A Slider Popup:
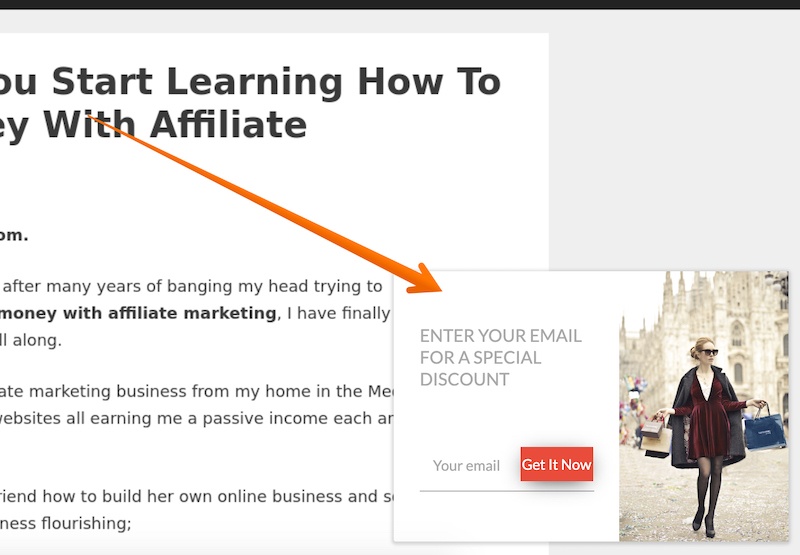
A slider popup is what I like to use in my campaigns and they work incredibly well (the popup you saw show up on this page is a slider popup).
A Page Takeover Popup:
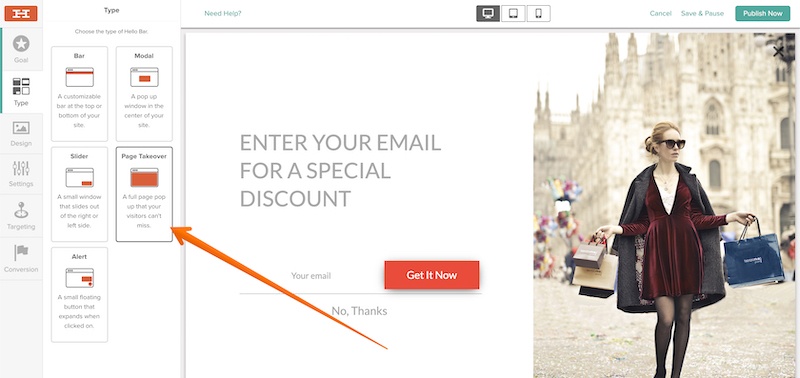
This popup takes over the entire page when it’s triggered and I don’t like to use it for that same reason.
I’m pretty sure it converts well for those who try it, but as I guess you’ve realized;
I’ve got a great thing going with the slider popup and I don’t want to change it!
An Alert Popup:
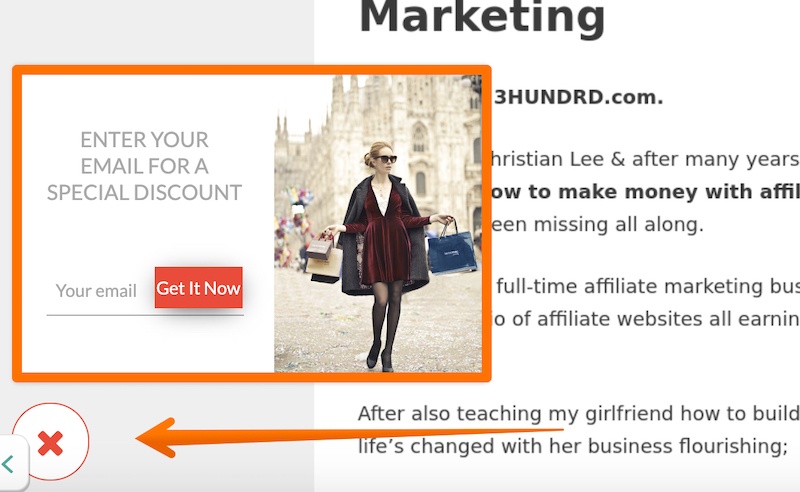
Last but not least, we also have the “alert popup” which works just like the slider popup but once closed, it can be reopened with a click of a button.
How To Use HelloBar (For Best Results)
The best way to get started with HelloBar, in my opinion, is by first testing out the Slider popup.
I know I may be a bit biased here, and I have no proof to back this up, but starting with the Slider popup will probably be the best way to test out this tool.
With a premium plan (which we will discuss shortly), you can also A/B test different popup types against each other and see what works best for you.
This is a simple A/B test I’m running on my Slider popup and as you can see (even though the popups are very similar) one of them converts nearly twice as much as the other:

That means double the subscribers I get, which is not something to disregard.
I highly recommend you test different popup types and different wording/images and CTAs when you are trying to build an email list as even just a “minor” change can make a world of difference.
Why I Enjoy Using HelloBar On My Websites (Pros)
Now that I told you what you can look forward to and what to expect, let me share a few pros (and cons) about Hellobar I think you should know about.
✔️ Perfect Mobile Optimisation
I have used other similar popups tools in my business and they were a nightmare to get them to “look right” on a mobile phone.
With Hellobar, this issue is now long gone.
Not only because you can easily preview your popups on desktop, tablet and smartphone while you’re creating them, but they also appear as they should when they’re actually live.
✔️ It’s Quick & Easy To Set Up
HelloBar is very easy to set up.
All it takes is a (free) account and you only need to install the HelloBar plugin on your WordPress website and it’s ready.
(I will show you how to set up the plugin down below).
✔️ The A/B Testing Is Remarkable.
When you have a paid plan, you can easily start creating multiple variations of your popups to test them out.
As mentioned above, you should always be testing something out with your popups.
You want to make sure you are getting the most out of Hellobar and the most out of your traffic.
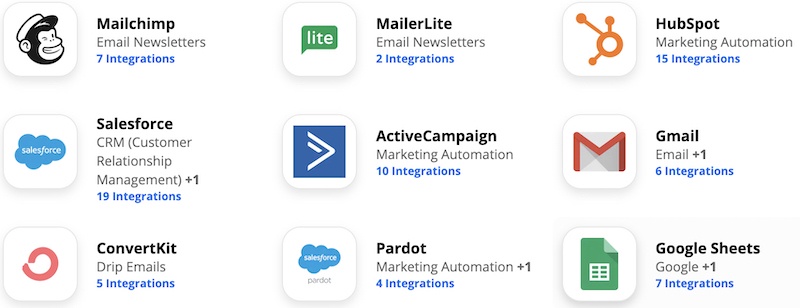
✔️ Syncs With Other Email Marketing Services
I use Aweber to manage my email lists. With HelloBar, I can easily sync all my email subscribers onto Aweber without needing to do any “extra” work to transfer them onto my “official list”.
You can see what else connects to HelloBar on this page here.
How The HelloBar Can Be Better (Cons)
While I do enjoy using HelloBar and at this point (& it’s irreplaceable for my business);
It’s not all rosy either.
Here are a few annoyances you will encounter using the HelloBar plugin.
✖️ It’s Not Cheap
HelloBar is not cheap, at all.
In fact, it’s one of the most expensive marketing tools I use in my business.
However, it’s an expense I’m quite happy to spare seeing how most of my conversions and email subscribers come from Hellobar.
✖️ It’s Not Easy To Cancel
This is probably the biggest issue I have with HelloBar.
To cancel your premium membership, you have to get in touch with Support and tell them why.
Of course, they would not refuse you, but I would much rather prefer to be able to cancel whenever I want (not that I plan on canceling anytime soon).
✖️ Pop-Up Targeting Is Lacking
There are plenty of unique targeting options you can use in Hellobar.
You will find these in the “targeting” setting and only IF you have a premium Growth membership plan.
However, there is one simple thing that I would like to see that is missing;
Targetting by post-category!
I would like to target popups to different categories on my website, but unfortunately, this is not an option at the time of writing.
How Much Does HelloBar Cost?
Right, let’s talk about pricing now.
How much does all of this cost?
There are three membership plans you can choose from, these are:
- The free starter plan – $0
- The Growth plan – $29 p/month
- The Elite plan – $99 p/month
For the difference between the three, you can see this image here:
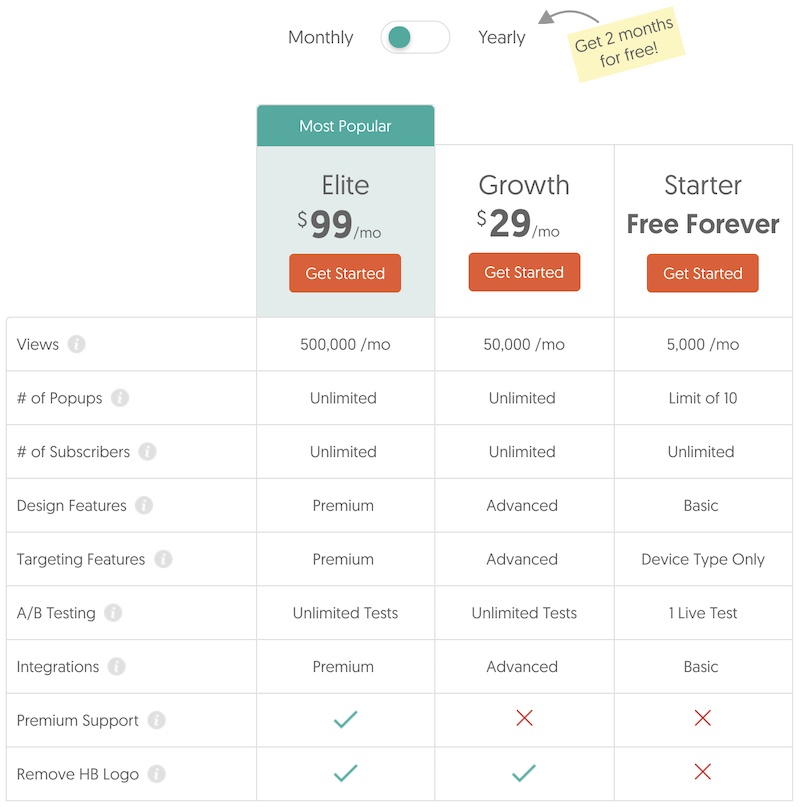
I am either on the free plan or on the growth plan as I don’t see to go on the Elite plan just yet.
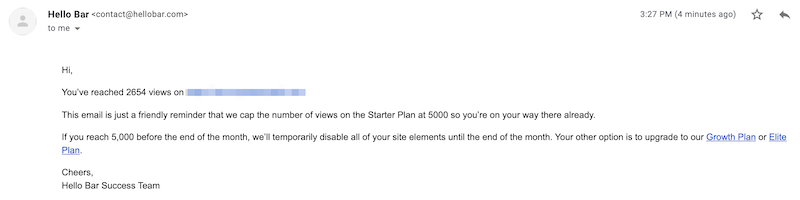
If you are going to try Hellobar on the free plan (which is what I suggest you do), one great tip I can share with you is to
Set up your popups to show at 15 seconds+.
This means which means fewer viewers will see it, but you can at least stay within the 5000 pageviews per month plan and;
You also get the added benefit that whoever sees the popup is a “high quality” reader.
If you’re on the free plan, and you’re fast-approaching the 5000 cut-off limit, you will also get an email to ask you to upgrade:
The Best (Easiest) Way To Set Up HelloBar On Your Website
Last but not least, I also want to share with you how to get started with HelloBar and how to set it up on your website.
Step 01: Visit The Hellobar Website
Simple and straightforward.
You can visit the website using this link here.
Step 02: Instal The Hellobar Plugin (If You Are Using WordPress)
There are other ways to set it up, but the easiest way is to use the WordPress plugin.
You can get the plugin from here and upload it/install it on your website.
Step 03: Insert Your Hellobar Code In The Plugin Settings
If you go with the Hellobar plugin method, once you have created your HelloBar account, you will be given a “key”.
All you need to do is copy/paste the key from HelloBar and onto the HelloBar plugin.
Step 04: Create Your PopUp
Once the plugin has been set up, your next step is to create a popup using any of the above-mentioned types.
Pick a goal you want, create the popup (you also get a few templates to work with) and make sure you have set it upright.
- If you want to collect emails, make sure you connect it with your email service provider.
- If you want to divert traffic to another page, make sure the URL is working.
Once you’re happy with the finished product, click the Publish plugin and move on to step #5.
Step 05: Visit Your Website
That’s it.
You should see your popup show on your website in just a few seconds.
You’re all done, and your popup is now visible to your target audience.
Last but not least…
Any HelloBar Alternatives Worth Mentioning?
One other similar tool to HelloBar I’ve used is the Thrive Leads plugin, which admittedly;
I wasn’t too impressed with it.
When I first got Thrive Leads set up and running, I’ve canceled my HelloBar membership but quickly went back to it after realizing how great it actually is.
So while I would still suggest you look for some HelloBar alternatives if the price is off-putting to you;
I would highly suggest you try the free Hellobar membership first to see how it works and how you can put it to good use.
I’m willing to bet you won’t be disappointed. I’ve also been testing ConvertBox, which you may want to check out.
Overall, I give the HelloBar a thumbs up and a solid 4.5/5 rating.
- It works great
- It’s very easy to set up on your website, and
- I have managed to build quite the thriving email list, so I’m currently very happy with it.
If you’d like to see it in action, you can see the HelloBar tool in action on the HelloBar website.
